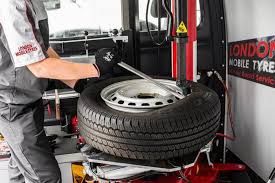
Emergency Tyre Replacement: What to Do When You Have a Flat
A flat tyre can happen at any time, often when you least expect it. Whether you’re driving to work, on...

A flat tyre can happen at any time, often when you least expect it. Whether you’re driving to work, on a road trip, or running errands, a sudden puncture or blowout can leave you stranded. Knowing how to handle an emergency tyre replacement is crucial for every driver. This guide covers everything you need to know—from identifying a flat tyre to safely replacing it and getting back on the road.
1. Signs of a Flat Tyre
Before a tyre goes completely flat, you may notice warning signs:
- Vibration or wobbling in the steering wheel
- Thumping or flapping noise from the tyre
- Difficulty steering or the car pulling to one side
- Low tyre pressure warning light (if your car has TPMS)
If you experience any of these, pull over safely to inspect your tyres.
2. Safely Pulling Over
If you suspect a flat:
- Stay calm and avoid sudden braking.
- Turn on your hazard lights to alert other drivers.
- Slowly reduce speed and find a safe spot to stop—preferably a flat, stable area away from traffic.
- Avoid sharp turns that could worsen tyre damage.
Never change a tyre on a curve or a narrow shoulder where passing vehicles could pose a danger.
3. Gathering Tools for Tyre Replacement
Before starting, ensure you have:
- Spare tyre (donut or full-size)
- Car jack
- Lug wrench
- Wheel wedges (or use a rock to prevent rolling)
- Flashlight (if it’s dark)
- Reflective warning triangle (optional but helpful)
If you don’t have these, call for roadside assistance instead of attempting a risky repair.
4. Step-by-Step Tyre Replacement
Step 1: Secure the Vehicle
- Park on a flat, stable surface.
- Apply the parking brake.
- Place wheel wedges (or heavy objects) against the opposite tyre to prevent rolling.
Step 2: Remove the Hubcap (If Applicable)
Some wheels have hubcaps covering the lug nuts. Use the flat end of your lug wrench to pry it off.
Step 3: Loosen the Lug Nuts (Before Jacking Up the Car)
- Use the lug wrench to turn counterclockwise (lefty loosey).
- Don’t remove them yet—just loosen slightly.
Step 4: Jack Up the Car
- Locate the proper jacking point (check your car’s manual).
- Place the jack securely and raise the car until the flat tyre is 2-3 inches off the ground.
Step 5: Remove the Flat Tyre
- Fully unscrew the lug nuts and set them aside.
- Grip the tyre firmly and pull it straight off.
Step 6: Mount the Spare Tyre
- Align the spare with the wheel bolts.
- Push it into place and hand-tighten the lug nuts in a star pattern.
Step 7: Lower the Car and Tighten Lug Nuts
- Carefully lower the jack until the car is stable.
- Use the wrench to fully tighten the lug nuts in a star pattern for even pressure.
Step 8: Check Tyre Pressure and Drive Safely
- Ensure the spare is properly inflated (donuts usually require 60 PSI).
- Avoid high speeds—most temporary spares have a 50 mph (80 km/h) limit.
- Drive to a tyre shop for a permanent replacement ASAP.
5. When to Call for Help Instead
Some situations require professional assistance:
- No spare tyre (many modern cars omit them)
- Damaged or missing tools
- Unsafe location (busy highway, uneven ground)
- Severe wheel damage (bent rim, shredded tyre)
Roadside assistance or a mobile tyre service can help in these cases.
6. Preventing Future Tyre Emergencies
To reduce the risk of flats:
✔ Check tyre pressure monthly (underinflated tyres wear faster).
✔ Inspect for nails, cracks, or bulges regularly.
✔ Rotate tyres every 6,000–8,000 miles for even wear.
✔ Avoid potholes and debris when driving.
7. Conclusion
A flat tyre doesn’t have to ruin your day if you’re prepared. By following these steps, you can safely replace a tyre and continue your journey. Always keep an emergency kit in your car and know when to call for professional help. Safe driving starts with being ready for the unexpected!


